Start Here · Instagram Stories
Instagram Stories 101:
The Buttons You Actually Need to Know
New to Stories? Don’t worry about strategy yet — this just shows you what each button does so you feel comfortable making one. Follow these eight small steps and you’ll have a Story posted today.
Story 1 — Add your content
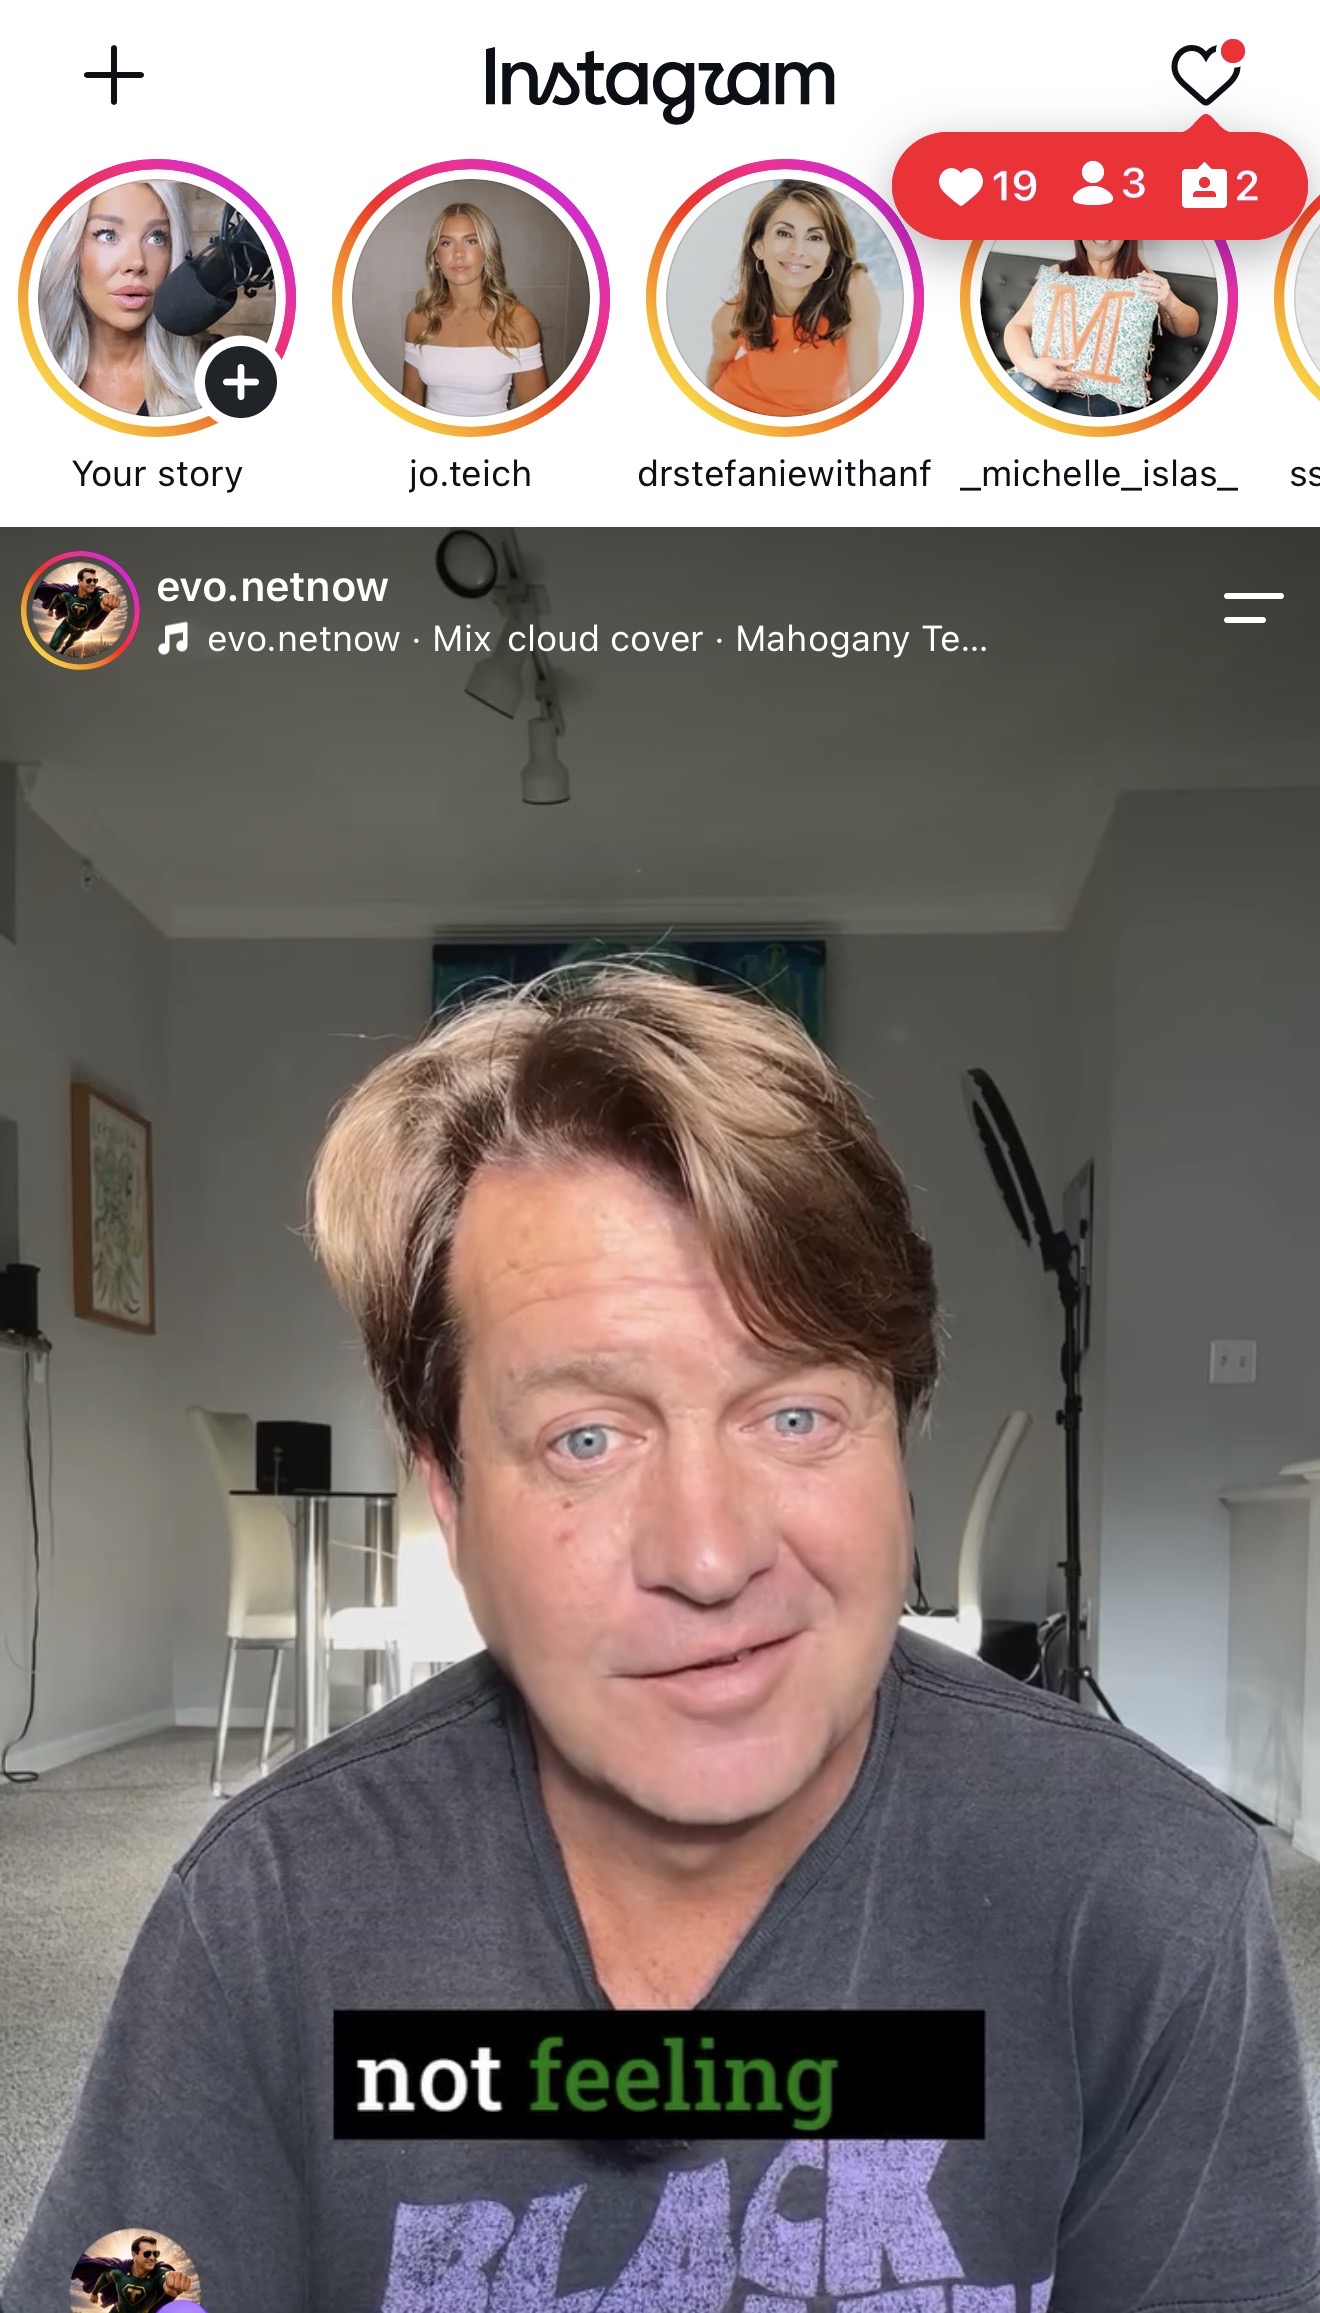 tap +
tap +- →First, open Instagram and tap the “+” button at the TOP of the screen (or tap “Your story” at the top of your feed) to start a new Story.
- →Start by choosing a photo or video from your camera roll.
- →You can also take one right inside Instagram — tap the big round button at the bottom (tap for a photo, hold for a video).
- →The little square in the bottom-left opens your camera roll.
Story 2 — Add words
- →Tap Aa (top-right) to add text.
- →Pick different fonts from the pill at the top.
- →Change the color using the dots.
- →Make the words bigger or smaller by pinching with two fingers.
- →Use your fingers to drag the words anywhere on the screen.
Story 3 — The sticker button (the 3 you actually need)
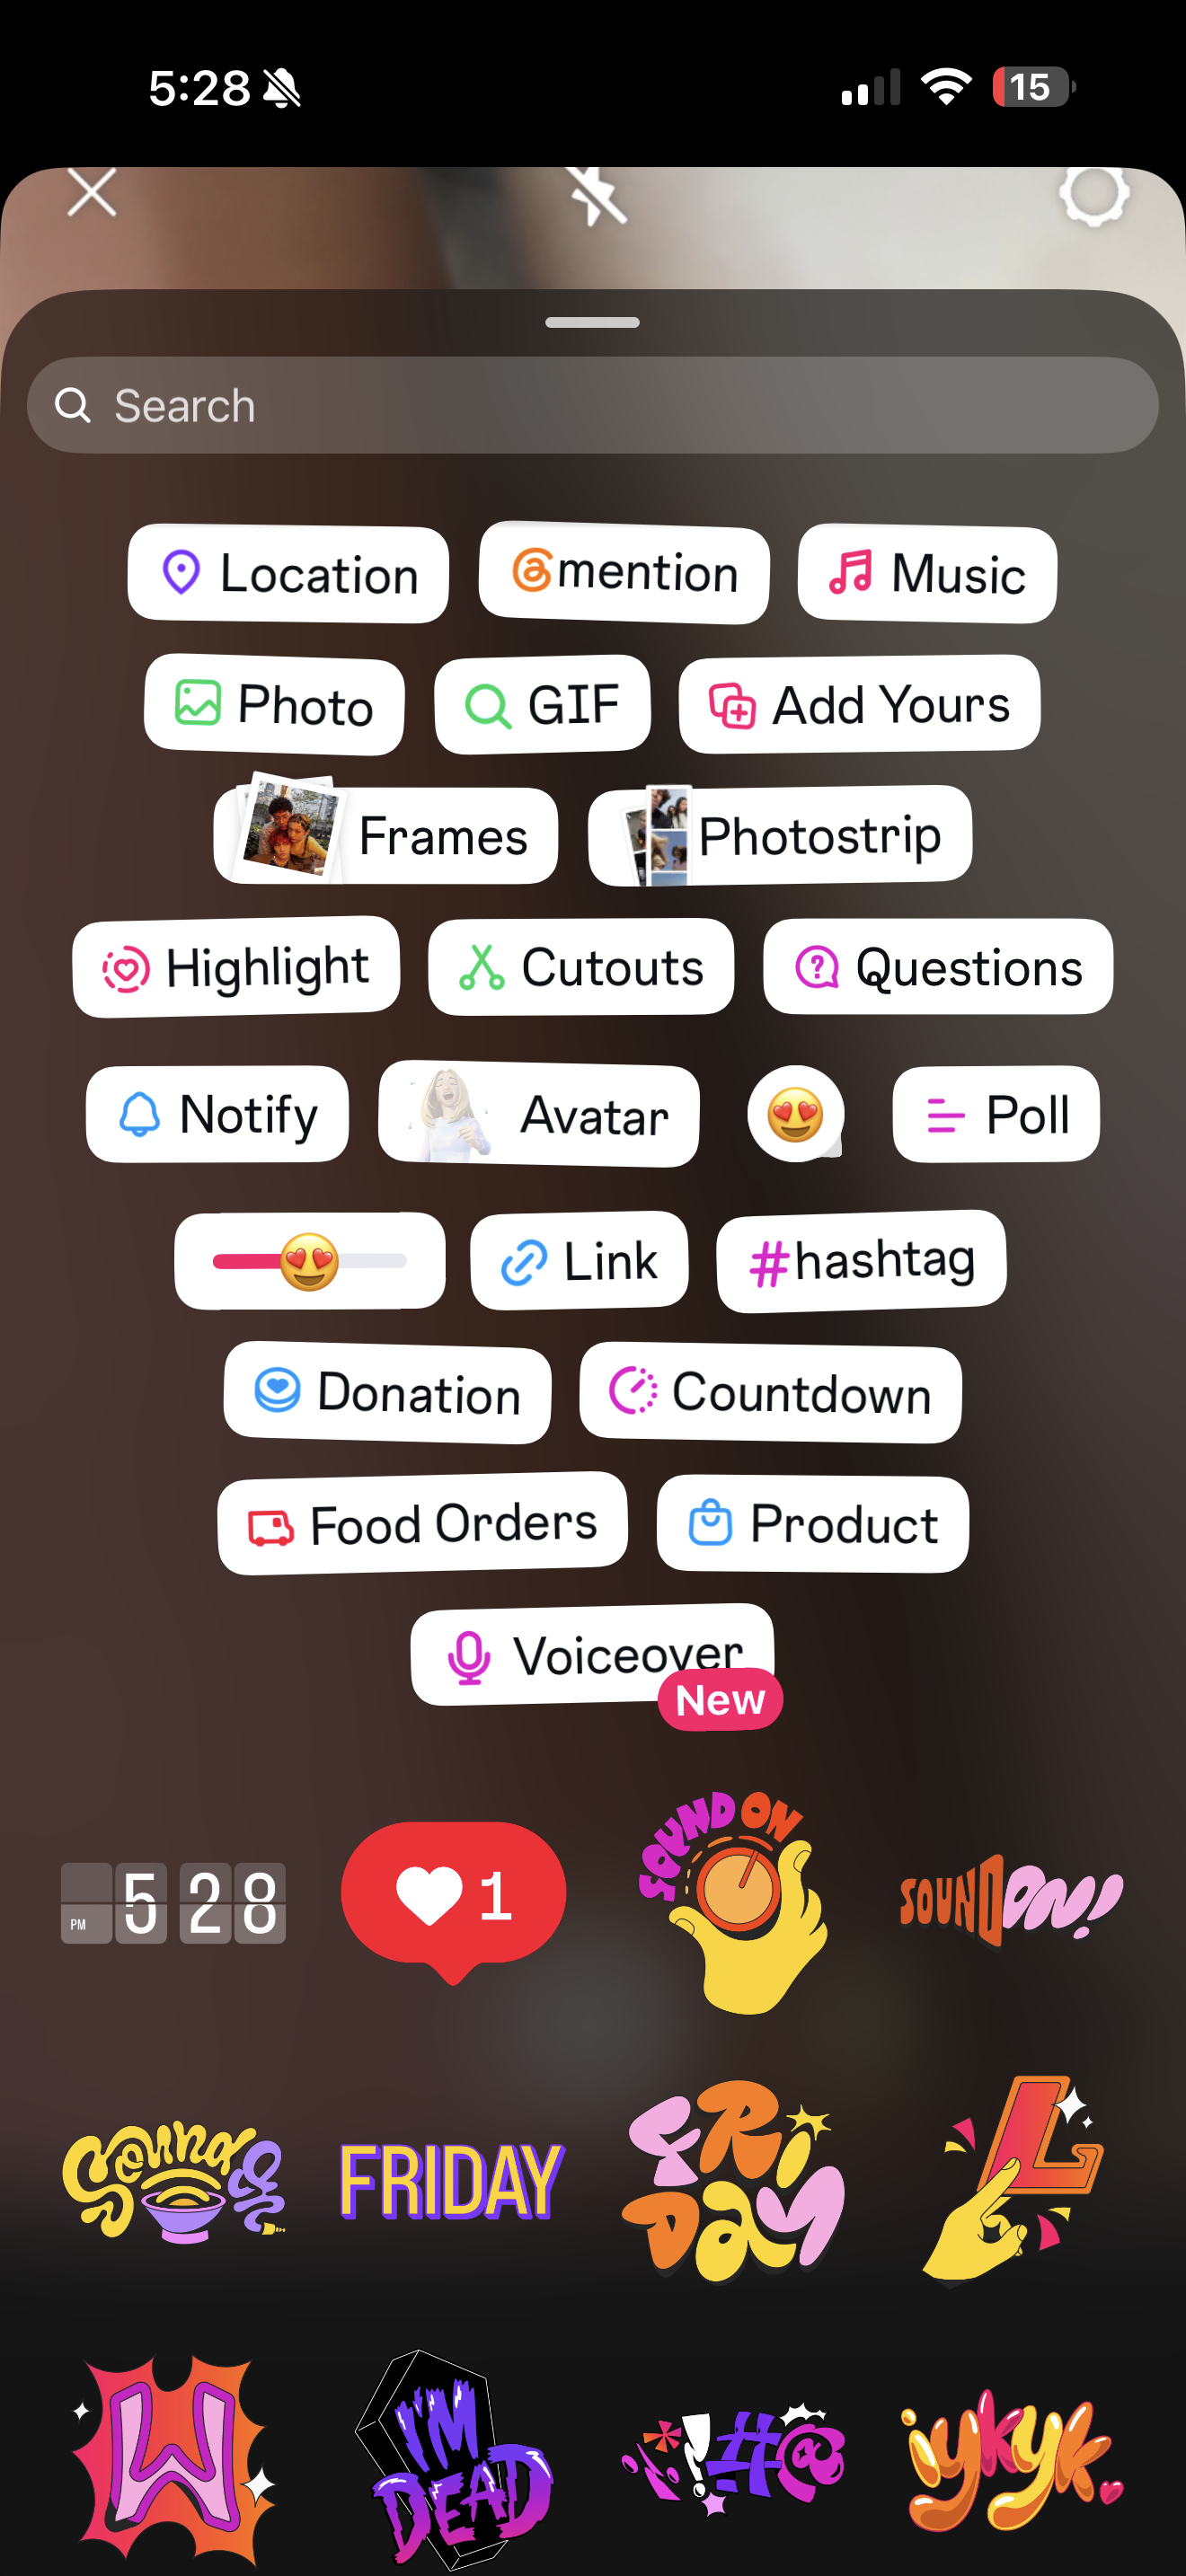
First, tap the little face/sticker button at the top of the screen (shown at the top here) — that’s the button that opens the sticker drawer, where everything in this step lives. The drawer looks overwhelming, but you really only need THREE things on it: LINK, MUSIC, and the emoji/picture stickers. Here’s what each one is for.
- →LINK — the one you’ll use the most. It puts a tappable button on your Story that sends people to your website, quiz, or product. Look for the chain-link icon in the sticker drawer.
- →MUSIC — adds a background song to your Story (we cover this in the music step below).
- →Emoji & picture stickers — the fun stickers at the bottom of the drawer (times, hearts, words, little characters). Tap any one to stick a picture or emoji onto your Story.
- →That’s really it — you can ignore the rest (location, mentions, polls, countdowns, etc.). They’re nice extras, but these three are all you need to get posting.
Story 4 — Add trending music (optional but powerful)
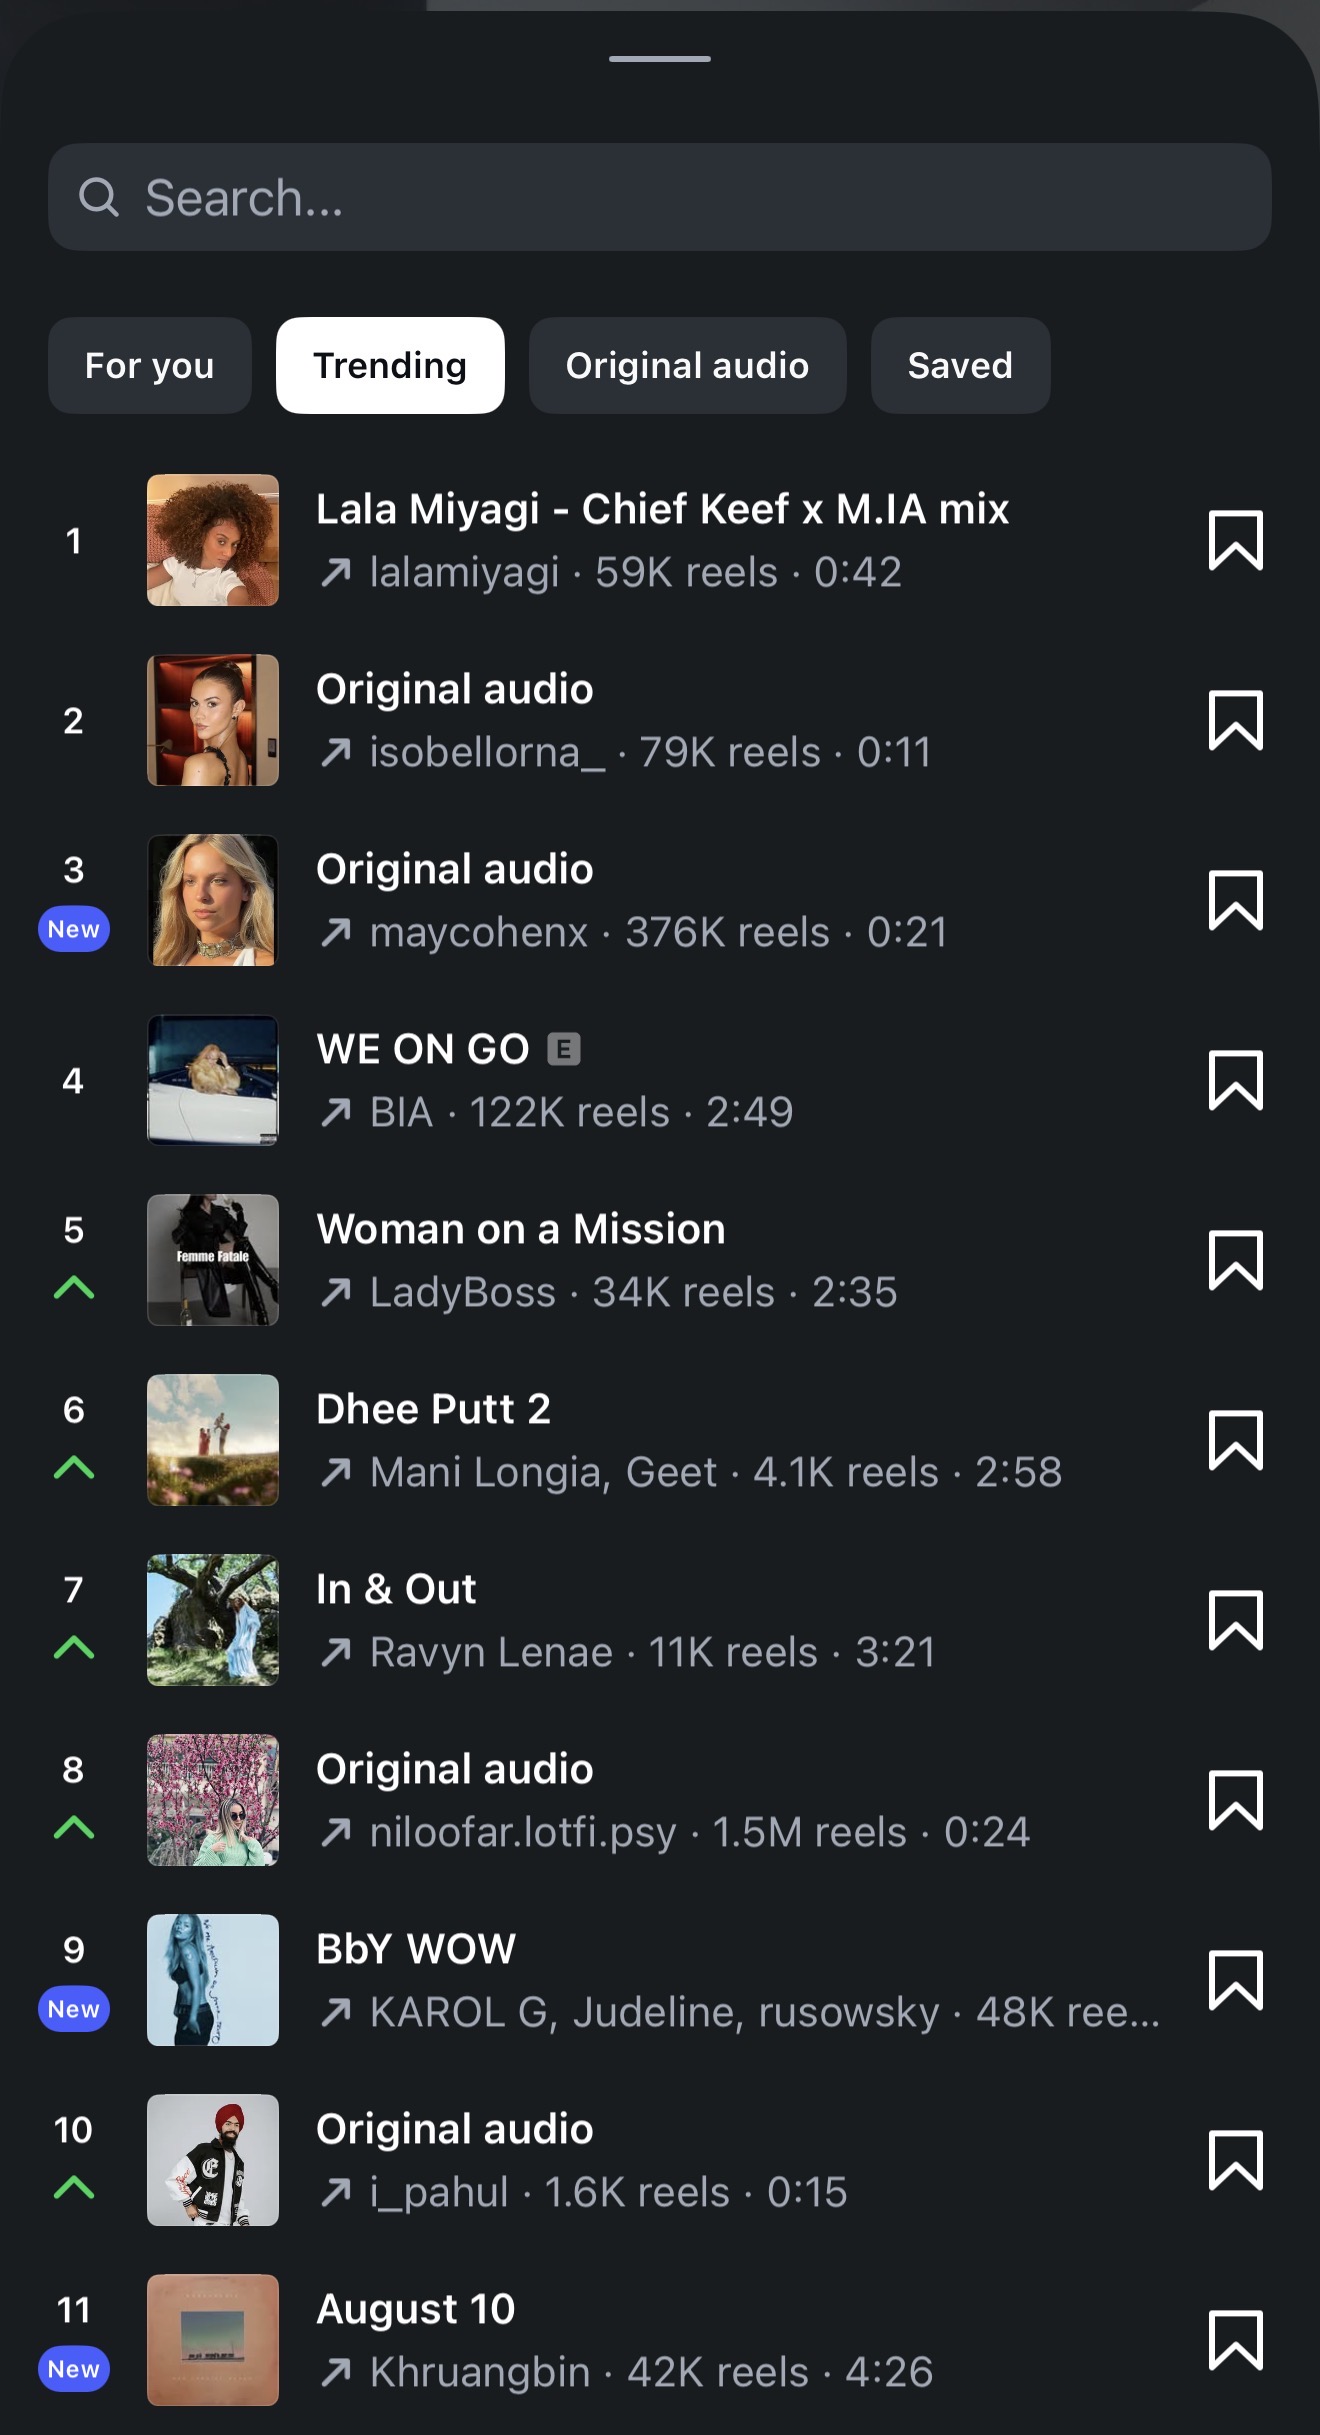
Adding music is easy — and there’s a neat trick: when an audio is trending, Instagram shows your Story to more people. Here’s how to find those trending tracks.
- →Tap the sticker button (the smiley face), then choose MUSIC.
- →In the music tray, tap the “Trending” tab at the top.
- →Look for a green up-arrow (↑) next to a track — the green arrow means that audio is trending right now.
- →Trending audio = Instagram pushes your Story to more people. Pick a trending track whenever you can.
- →Once it’s posted, your track and artist appear in the top-left of your Story.
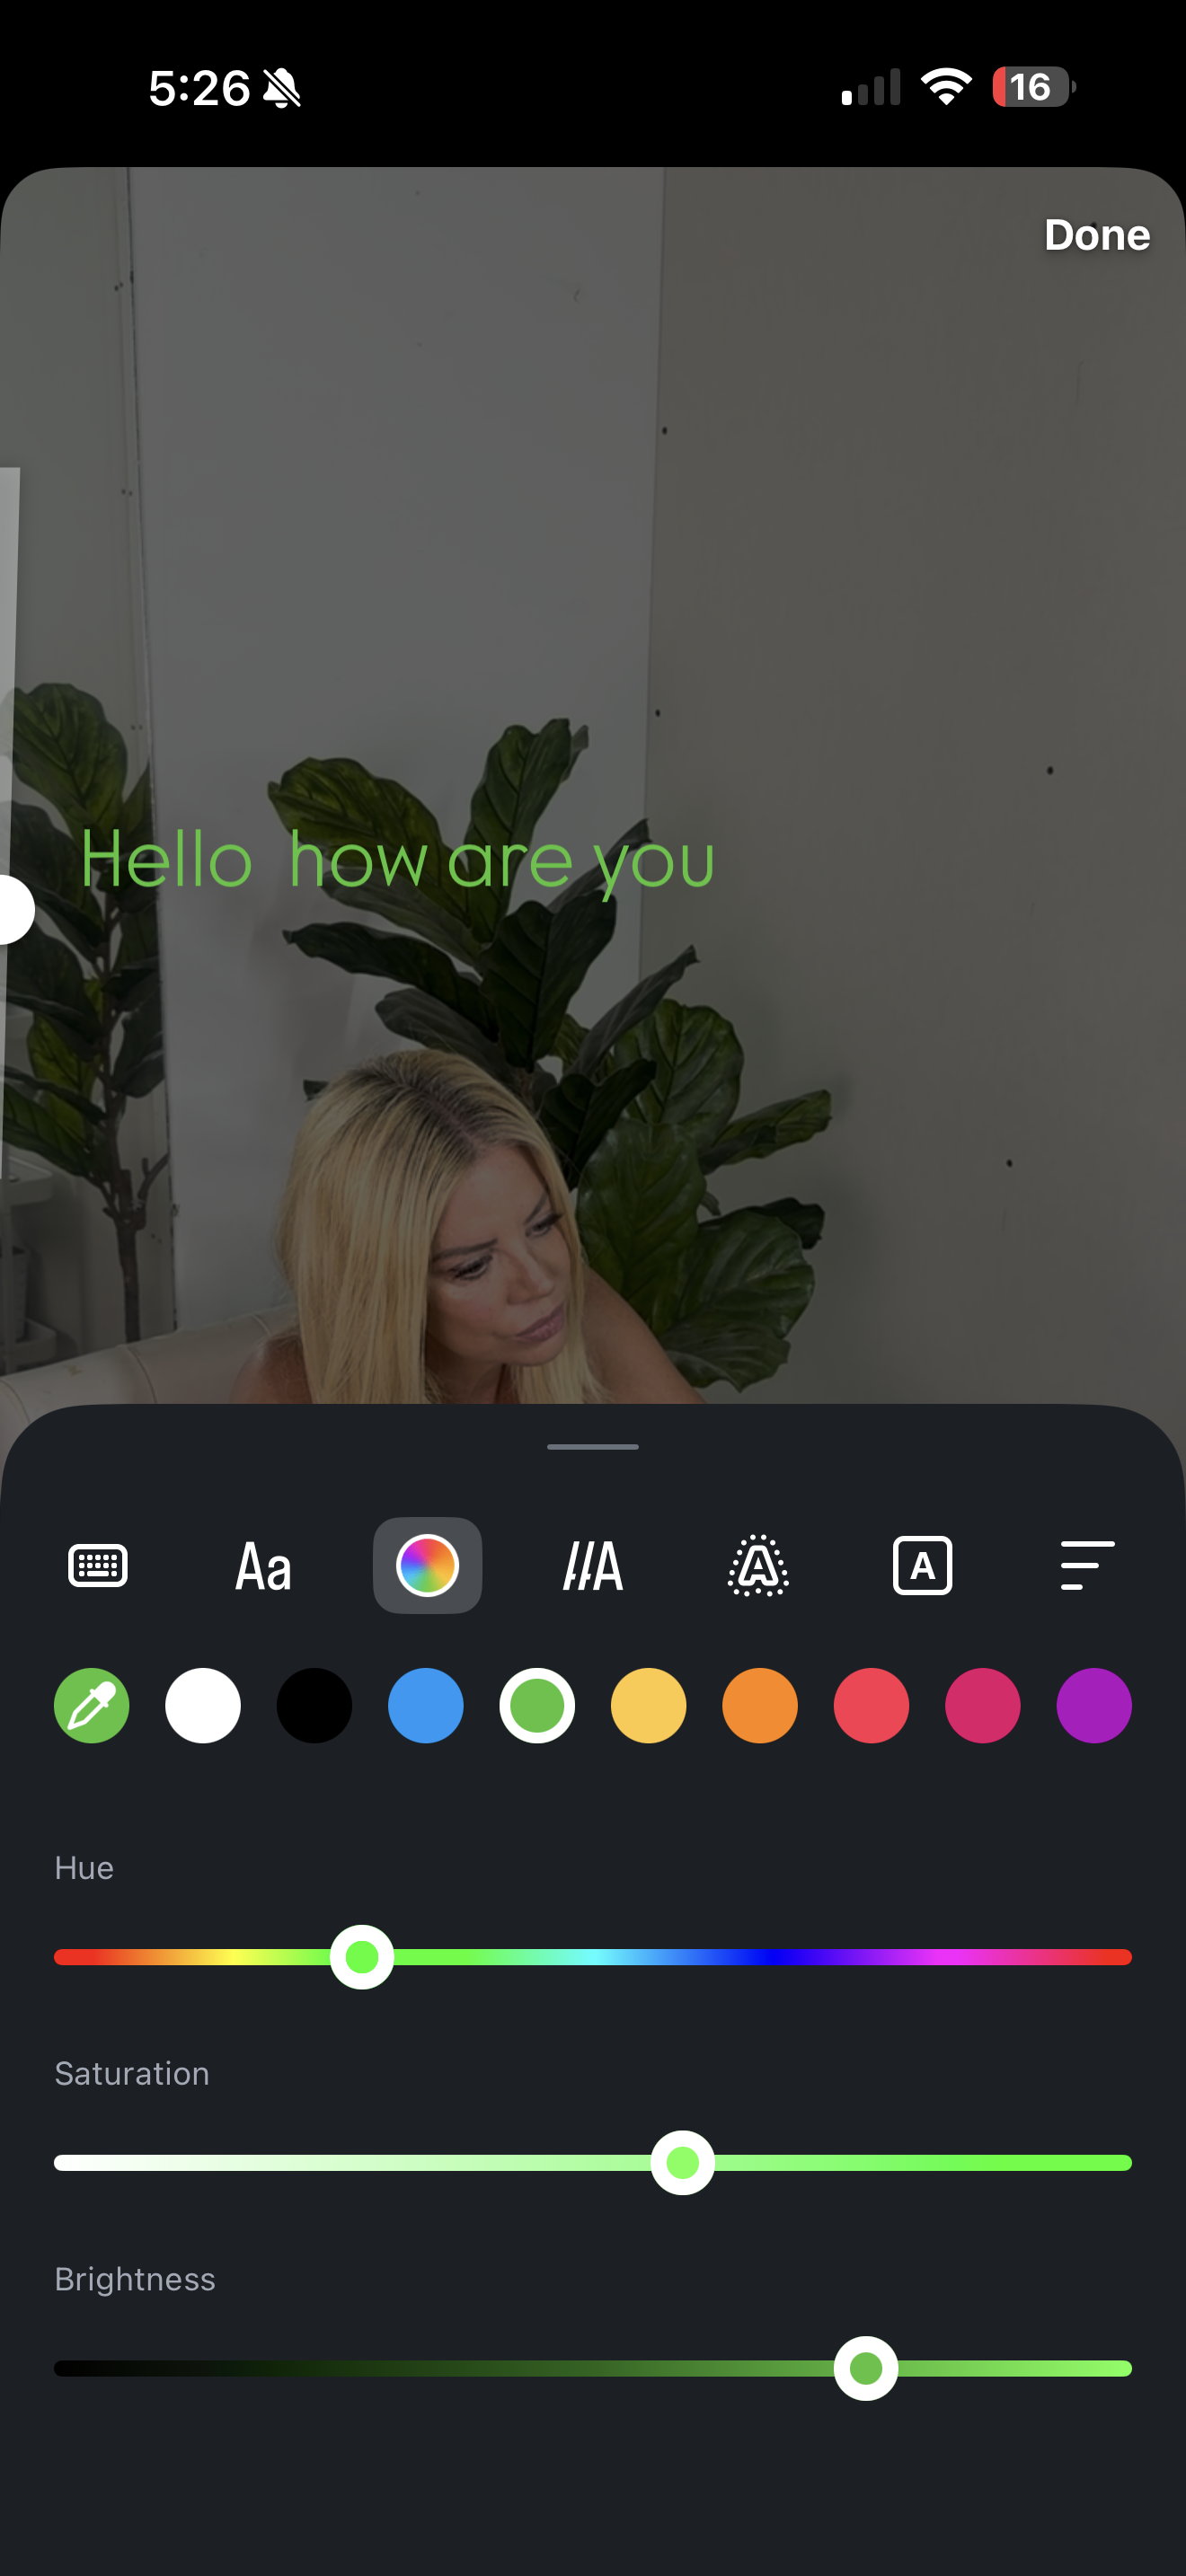
Story 5 — Change the font color & move it
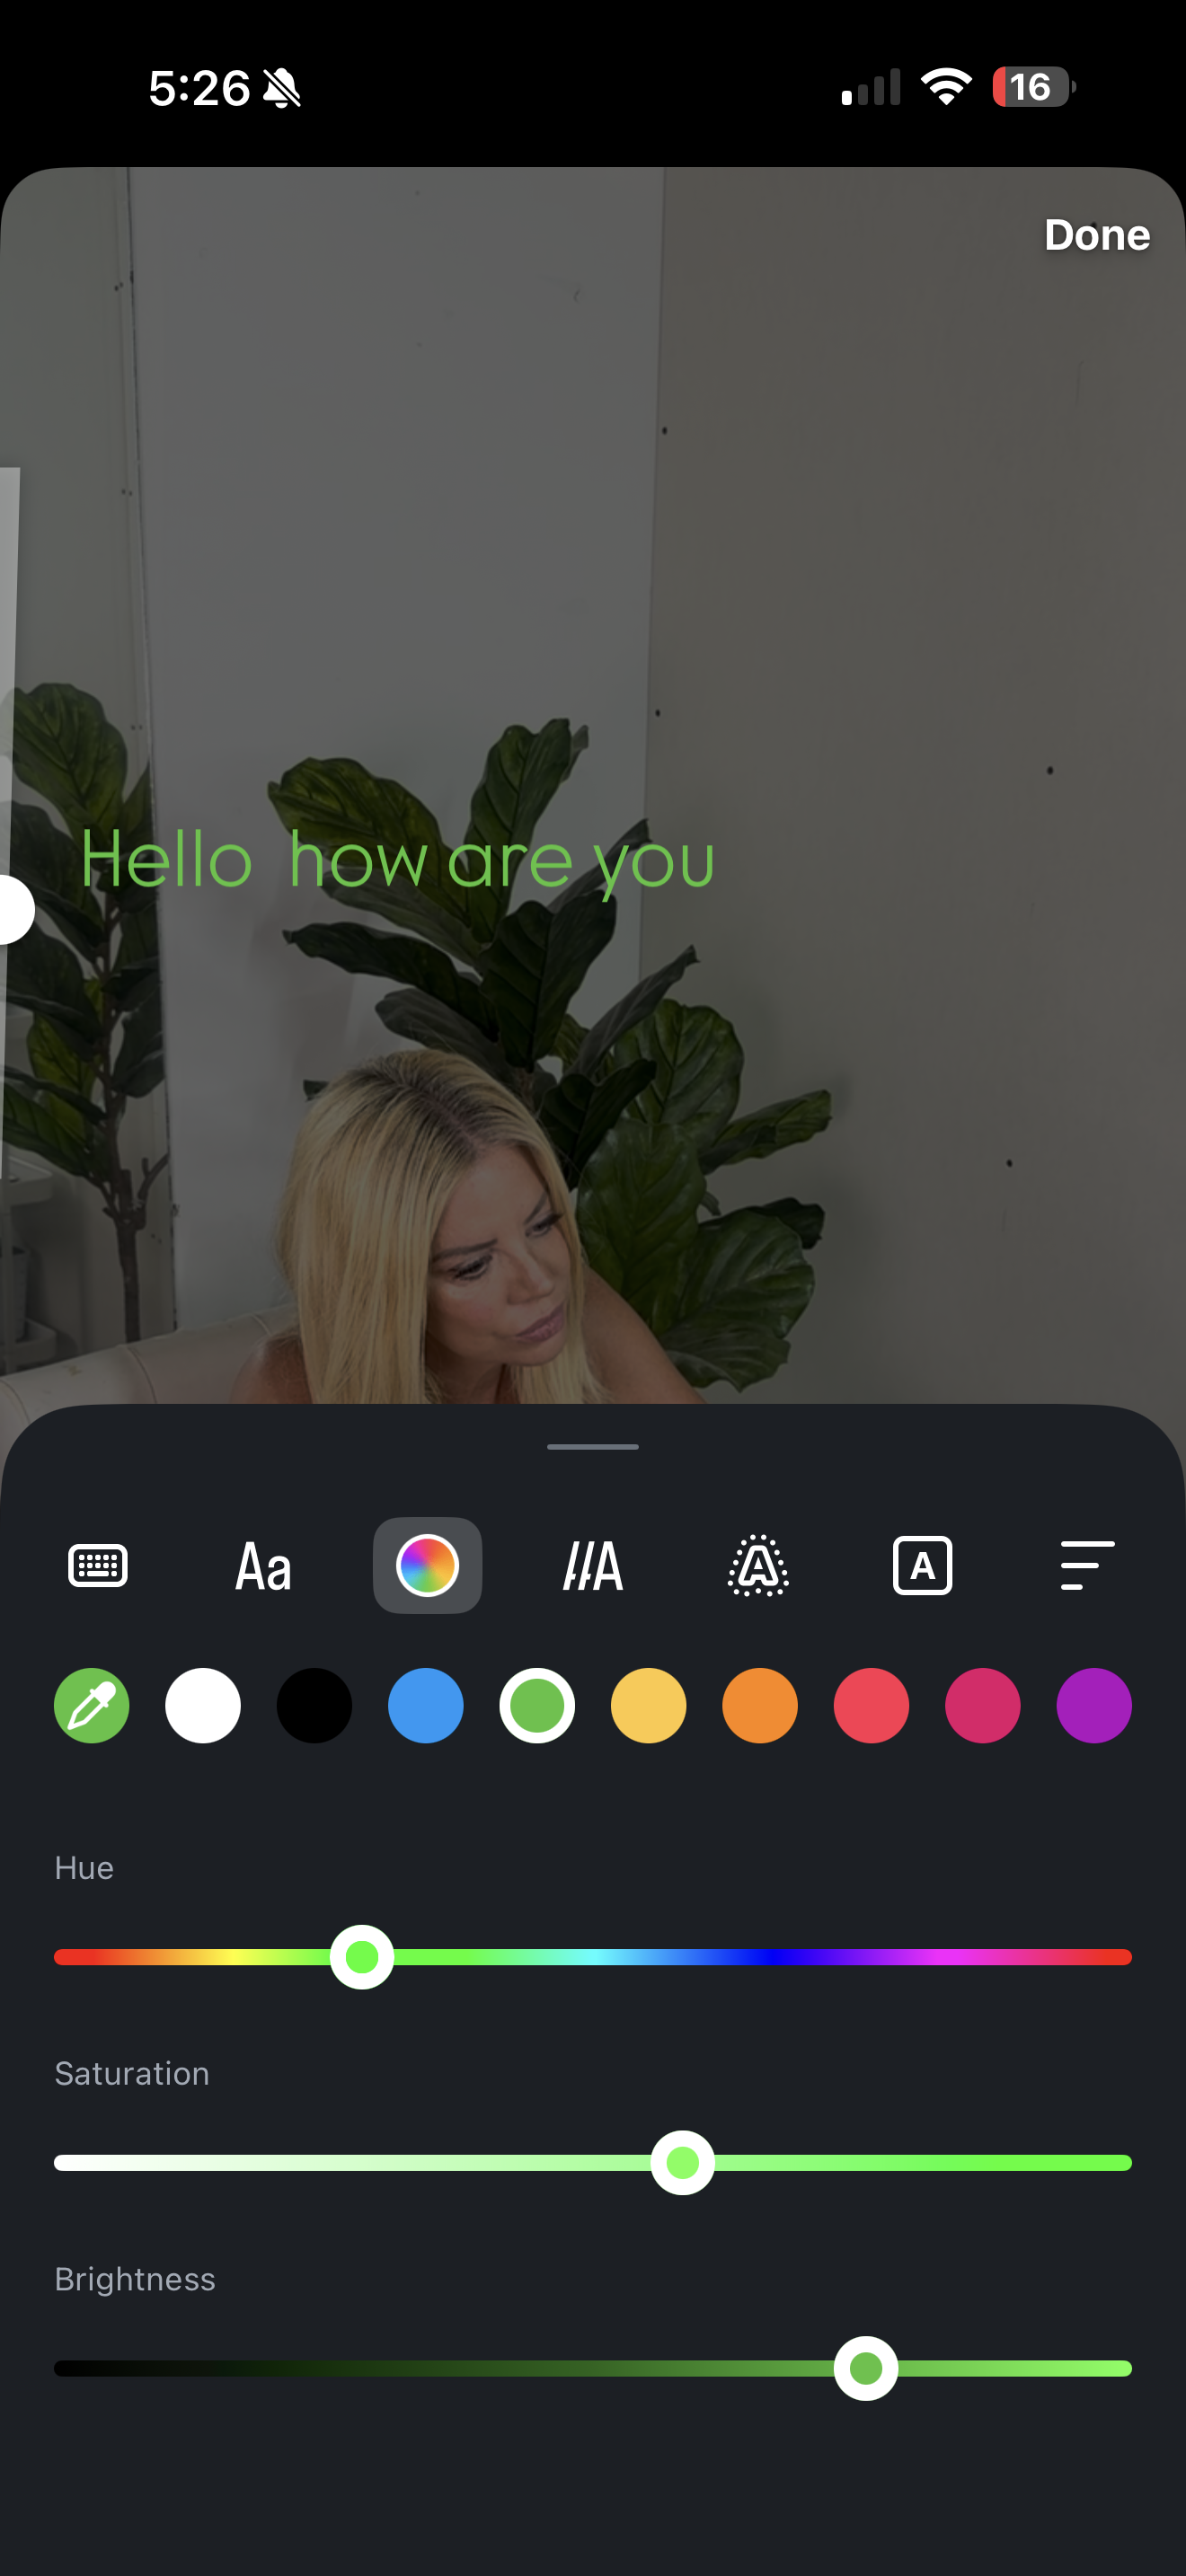
Here’s the color menu you’ll see while editing text — and how to move your words around.
- →While editing text, tap the color wheel icon (bottom of the screen) to open the color menu.
- →Tap any colored dot to instantly switch your font color.
- →Tap the eyedropper circle (far left) to grab a custom color straight from your photo.
- →For a precise shade, drag the three sliders — Hue (top, the rainbow), Saturation (middle), Brightness (bottom).
- →To move the text, press and hold it — use the little drag bar on its left to lift and place it anywhere.
- →To resize it, pinch the text with two fingers.
Story 6 — The text toolbar — every button explained
When you’re editing text, this little menu sits above the keyboard. Here’s what every single button does, left to right.
- →1 · Keyboard — shows or hides the keyboard so you can type and edit your words.
- →2 · Aa (Font) — switches between Instagram’s different font styles (classic, modern, neon, typewriter, etc.).
- →3 · Color wheel — opens the color menu to change your text color (tap a dot, use the eyedropper, or the sliders).
- →4 · ||A (Highlight) — drops a colored bar behind your words so they stand out against the background.
- →5 · A with the dotted circle (Animate) — adds an entrance effect so your text fades, types, bounces, or pops in.
- →6 · A in a square (Background) — cycles through solid color blocks or see-through backgrounds behind your text.
- →7 · Alignment (the lines) — switches your text between left, center, and right-aligned.
Story 7 — The side toolbar — every button explained
When you’re editing a Story, these six buttons float on the right side of the screen. Here’s what each one does, top to bottom.
- →1 · Aa (Text) — adds written words to your Story. Tap it, type, then drag the words where you want them.
- →2 · Smiley / Sticker — opens the sticker tray (links, polls, GIFs, mentions, location, and more). This is the one you’ll use the most.
- →3 · 🎵 Music — searches for a song and adds it as background music on your Story.
- →4 · @ person with a check (Mention) — tags another Instagram user so they get notified you tagged them.
- →5 · 🔊 Speaker (Audio) — controls the sound on your clip: turn the original audio up, down, or off.
- →6 · ▾ (More) — opens the extra tools you can’t see, like the drawing/pen tool and other options.
Story 8 — Post it
tap to publish
- →Move everything around until it looks good.
- →Don’t overthink it — Stories are supposed to feel personal and real, not perfect.
- →Then tap “Your Story” (bottom-right) to publish it.
That’s the whole thing. Once you’ve posted a few, scroll on for the full Stories strategy ↓